The making of RE:ACTING
Last summer I produced and shot a short film that just finished post-production and is now heading out to festivals around the world. We produced the whole film for less than $3 000 (most of which went into post-production). Despite that we kept the production value high and managed to shoot 25 scenes and 33 pages over 7 days.
This blogpost is the first part of a series of breakdowns that show the process of planning and shooting RE:ACTING.
This is the third scene in the film and the story so-far is that our main character Karl has just accepted his friend and drug-dealer Josef’s proposal to tag along for a drug deal in order to get the acting experience he needs to get cast in bad-guy roles.
This scene was the first out of three scenes we shot that day as you can see in the schedule below.

Schedule for day 4 out of 7
In planning this film it was vital to find the essence of each scene so that we could get all the footage we needed while needing as few setups as possible.
For this scene we had a couple of things we wanted to show:
- Establish Karl’s insecurity heading towards a drug deal
- Capture Josef falling out of the window in a humorous way
- Show water bottles in the front seat (relevant later in the film)
- Establish the broken-down car
- Make it visually fun!
Planning
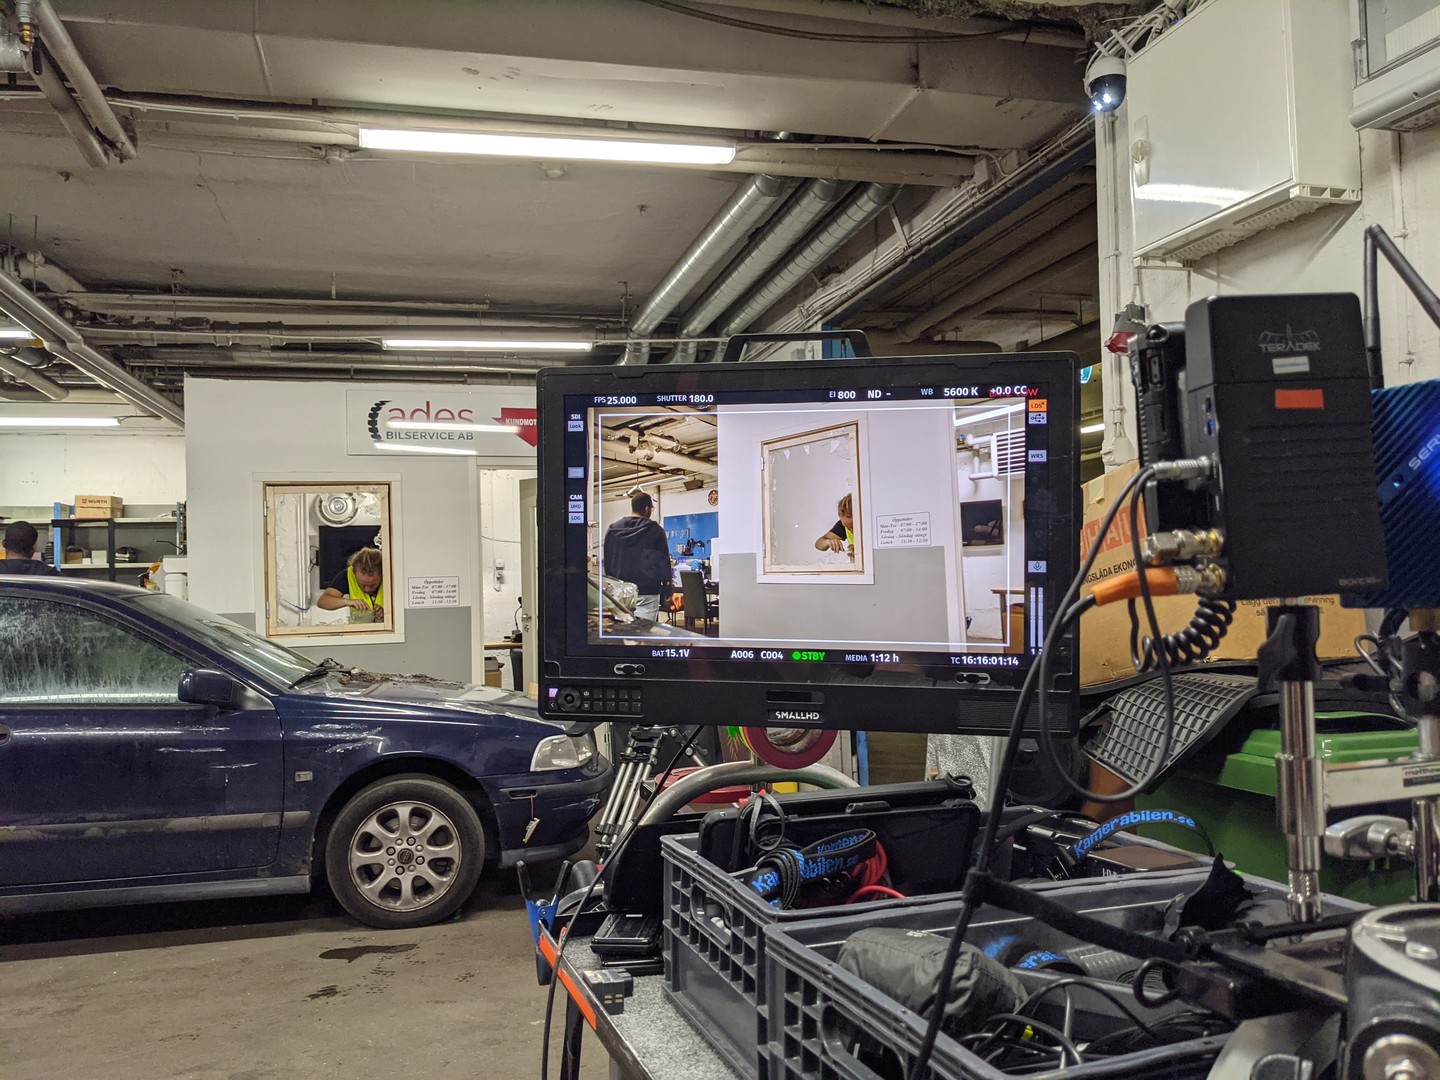
This scene could have easily used dolly- or crane shots, advanced lighting rigs and a shot list with 10+ shots, but we knew that we had to do this scene in about two hours from arriving at the location. That time also included adjusting available lighting, rigging a fake window with broken glass, rehearsing the blocking with the actors, getting a couple of takes done, rigging down and more.
We were convinced that we could get one dynamic shot to capture the whole scene using just a tripod if we blocked it well. We made sure to have things happen in different parts of the frame to keep the viewer’s interest up throughout the scene, and we made Josef appear on screen before Karl sees him and had him fall out of the frame when climbing out to create visual humour.
My first previz of this scene when we didn’t have the location locked-in. The visual comedy is played similarly with us seing Josef fall out of the window behind Karl, but the location we ended up getting did not allow for this exact blocking. As so often is the case on a low budget, we adapt to the situation.
What we lost from one location, we gained at the other, we get a great close-up to start the scene with a slightly comedic entrance from behind the wall. Another advantage of this location is that we get a smooth shift of the focus of the scene. The scene starts to focus on Josef after he falls out the window and follows him around the car. This also got us the chance to do a whip-pan that emphasies the punchline which ends the scene.

The final location
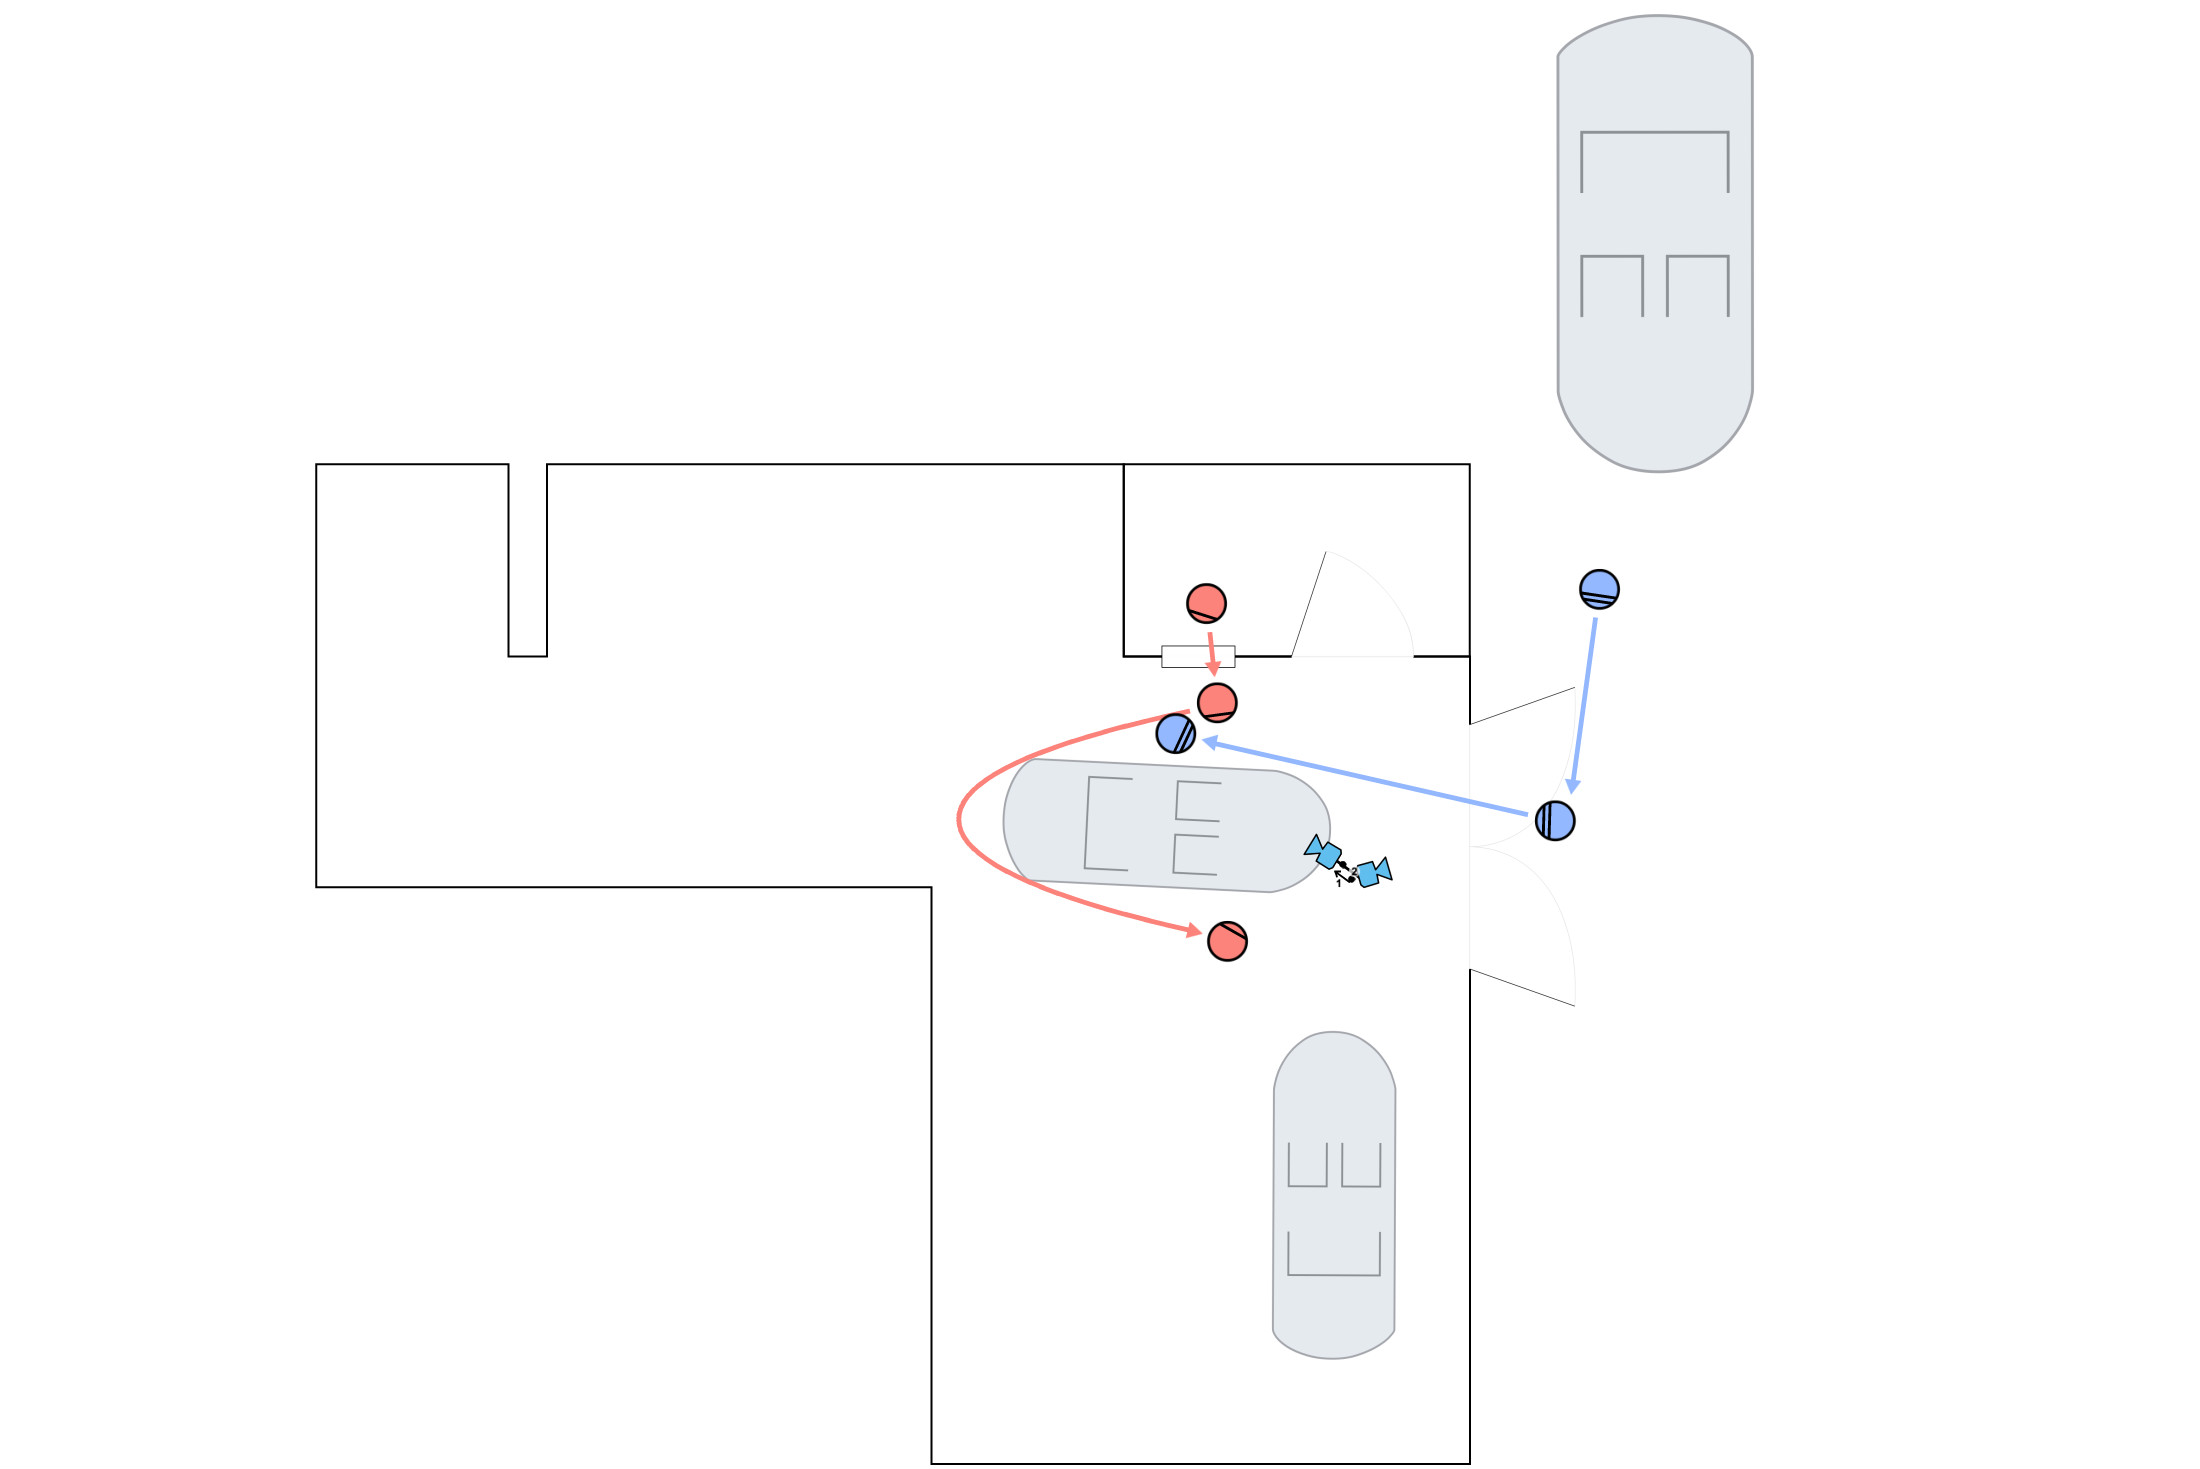
The layout of the location made it so that achieving the goals for the scene was only possible on one spot in the room, which worked perfectly for what we wanted to accomplish.

Floorplans like these were essential for communicating with the cast & crew
Rounding up
It’s easy to get too advanced when planning a scene, but as I showed you in this post when limited in time and complexity because of a tight schedule, it helps to focus on the key elements of the scene and then use those elements to guide you towards a more simple way of capturing it.
I’m very happy with how this scene came out, not just because we could shoot it in two hours, but also because the blocking works really well and I think we managed to get some good visual humour out of it.
I hope that this series of blogposts can be inspirational and helpful for those of you out there who are trying to produce your own short film on a tight to non-existing budget. Feel free to reach out to me if you have any specific questions, I’ll be back soon with part 2 where we break down another scene.
